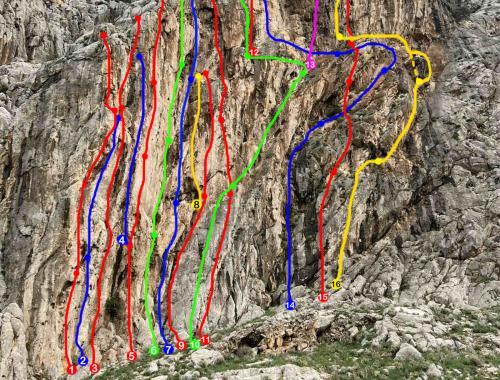

Voie sportive 6c+ (40 m) à la Tour — explosive, technique, avec un crux exigeant au milieu.

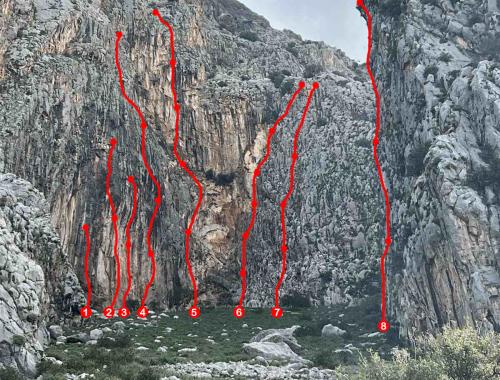
Classic 170 m line with beautiful dihedrals and chimneys — excellent for natural protection.
Technical Details
Length (m)
170.00
Pitches
5
Bolts
9
Belays
6
Rings
0
Description
Pitch 1:
Begins with a short traverse to the right from the belay spot. After the second bolt, move right into a dihedral. The belay is at a ledge at the end of the dihedral. Watch out for rope drag.
Pitch 2:
The hardest and most technical section, following the dihedral-chimney to the right of a distinctive main corner. The first 10 m contain loose rock, so extra care is needed. The first crux comes 2–3 m before the first bolt, and the second bolt requires chimneying technique to protect. Continue up the dihedral to reach the second belay.
Pitch 3:
Starts with a leftward traverse into a clear dihedral. After the first bolt, move right, then immediately left again toward the second bolt, which lies on a distinct arete. After clipping the second bolt, continue left along the arete toward another dihedral. Before the dihedral ends, move slightly left to reach the third belay.
Pitch 4:
Moves through terrain with vegetation and some loose rock. The belay is on a comfortable ledge, to the left of a tree.
Pitch 5:
Starts to the left of a rock block that hides the leader from view. Climb left of the vegetation, on the slab, with a tree to the far right. No fixed belay here — build one after topping out on broken terrain. Pay attention to rope drag.
The route requires good use of natural protection and has 4 fixed belay stations.
For a repeat ascent, take a full set of nuts and a set of friends up to Camalot #4.
Descent:
From the top, follow the ledge path up and right. The red markers lead toward the Kalinthoni gully, where two 60 m rappels bring you back to the ground.
Access
About 25–35 minutes from the Afrikana parking area. From there, move right toward the fig trees and along the base of the cliff. Walk across the distinctive metal bridge until it ends. About 3 m up and right, you’ll see the first fixed protection bolt (next to an old cut bolt). To the left of “Firefly” is “Matrix,” a sport route with many fixed bolts.
Approach time: 35 minutes
Recommended Equipment
Full set of nuts
Full set of friends (up to Camalot #4)
Slings
Two 60 m ropes (for rappel)
Helmet
Full set of friends (up to Camalot #4)
Slings
Two 60 m ropes (for rappel)
Helmet